Visual communication
Simply put: the quality of your visual communication will impact how seriously people take you.
- As an optometry student, good visual design means your communication videos or scientific posters will effectively convey information and make explicit your learnings - all things which can help with your grades.
- As an optometrist, you want to establish trust and credibility with your patients and colleagues.
- As an optometrist working in private practice, you want professional and persuasive design material because this will build your brand and set you apart from your competitors.
This page is an introduction to some basic design principles and tools that you can immediately put to use in your course and build on as you develop your careers.
Why does visual communication matter?
Visual communication is the sharing of ideas, information, and messages through imagery. Our brains are designed to respond to the visual. In fact, visual perception is faster than thinking! Vision is also our strongest sense when it comes to learning and memory. We are both quicker to understand and more likely to remember visual information than any other type. Having strong visual communication capabilities, such as understanding of design elements, can be a huge asset both for study and work.
In an information overload world, it's more important than ever to use effective visual communication to get your message across. By having a good grasp of some basic visual design elements, you will more easily and persuasively shape your communication.
Visual communications capabilities
This module will build your knowledge in four main areas of visual communication. You can apply this understanding to create outstanding scientific, educational, or research posters.

Digital tools and templates that can be used in creating a visual design
Basic visual design elements that can inform visual communications
Significance of copyright requirements and attributions in visual communication
How accessibility impacts visual communications and therefore visual design choices
Digital tools for design
There are a number of digital design tools available. Some have templates you can start with while others have advanced design functionality. Here are some options to consider:
| Tool | Level | Costs | Templates | Online tool | High functionality | Professional design quality |
|---|---|---|---|---|---|---|
| Canva | 1 | Free | ||||
| Piktochart | 1 | Free | ||||
| Vectr | 3 | Free | ||||
| PowerPoint | 3 | Free | ||||
| GIMP | 5 | Free | ||||
| Adobe products | 5 | $12.99 for Deakin |
Templates for design

Templates can be helpful when you are not sure how to get started with your design. Digital tools for design often include a number of good quality templates for different projects.
Canva and Piktochart are two tools mentioned earlier that have easy to use online poster templates. Similarly, there are many freely available PowerPoint poster templates you can find and download.
Just search online for scientific posters, educational posters, research posters, academic posters, and other relevant templates that match to the digital design tool you are working with.
Templates can give you inspiration and save you time. However, starting from scratch is great if you have a clear vision of how you want your poster to look.
Whether you decide to modify a template or to develop your own style, understanding of visual design elements will be invaluable to your creative process as you shape your visual communication.
Visual design elements
Click any of the follow to go to the relevant section.


Layout
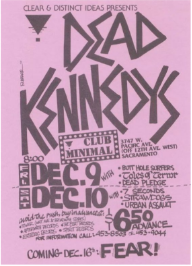
Layout is the arrangement of your design elements; the choices you make about the sizing, spacing, and placement of your images and text. Effective layout needs consistent design, to balance text and images, emphasise important information, group related content together, and be effortless for people to scan at a glance.
Visual communication relies on others being able to understand your information. Without an easy to understand layout, with clear flow between content, even the most basic concepts can get lost in translation.
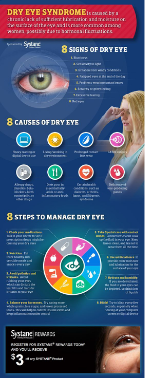
Scientific posters, for example, are notoriously difficult to read. A common layout mistake is trying to cram in too much information. Or having so many images it becomes confusing.
Sometimes less is more.
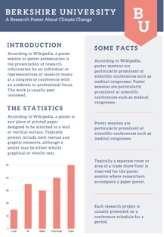
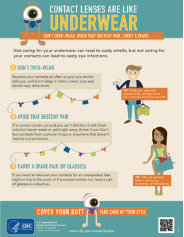
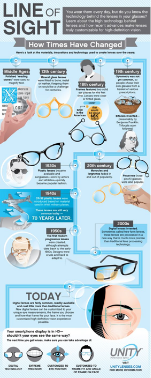
What do you think of this poster? Although deliberately exaggerated, it has layout mistakes that many people make. Too much text, images that don't assist clear communication, no clear focus, a distracting background, and it certainly isn't easy for people to scan.
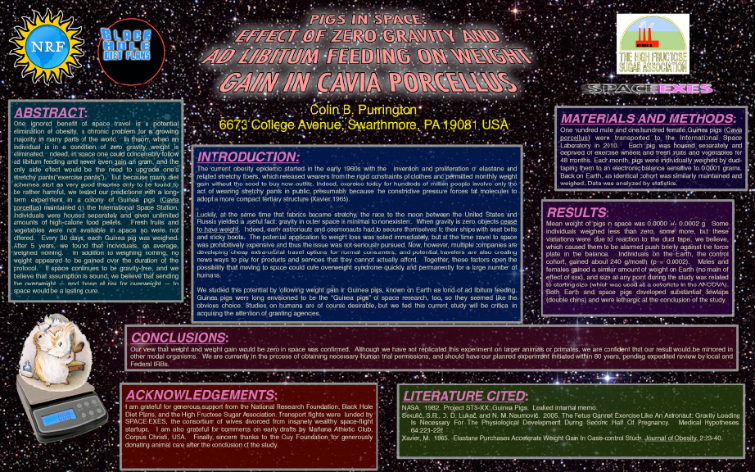
Bad conference poster example: Source
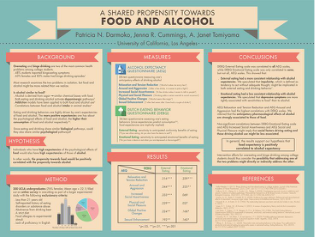
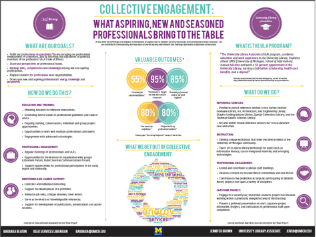
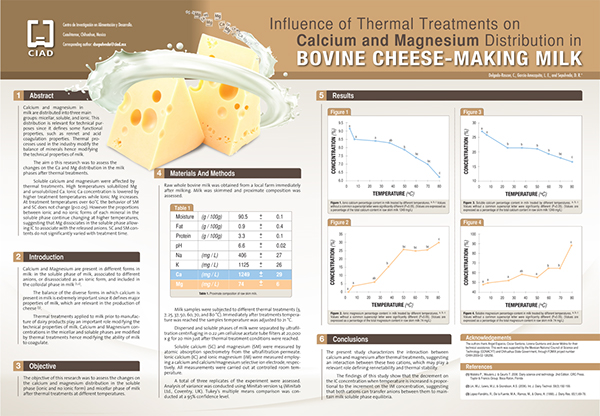
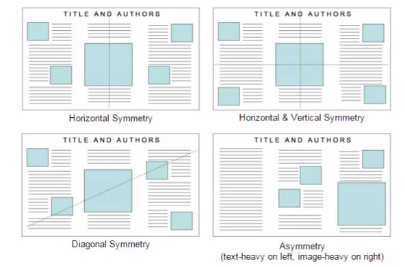
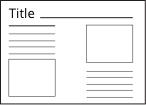
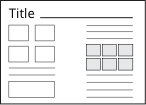
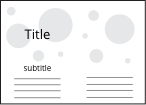
It's unlikely your design layouts would look like this, but it can be very easy to end up with an educational or scientific poster that's just average. For your poster, make sure your layout emphasises clarity and visual appeal in equal measure. Let's check out some examples of posters with different visual layouts to build your understanding and push your design skills higher.


Layout dimensions
The dimensions of your layout will impact on your overall design choices. So, you need to set your dimensions before you begin drafting your poster.
Remember that dimensions are contextual and will change depending on the purpose of your design. For example, some assessments and conferences have explicit requirements about a poster's size and orientation.
Typically, scientific posters are A0 sized but always check whether you have specific dimensions you need to take into account.
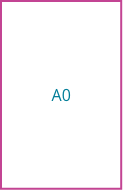
841 x 1189 mm
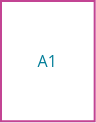
594 x 841 mm

420 x 594 mm

297 x 420 mm
Layout checkpoint
A design layout should:
- Have relevant dimensions
- Be clear and readable
- Group related content together (e.g. a figure and related information)
- Have a consistent look
- Have a good balance of text and images
Draft layout steps

Choose how many sections your poster needs: eg. overall title, introduction, methods, results, discussion, acknowledgements*

Create a black rectangular outline for each section and label them

Create a space for each section of text you need

Consider how many images and graphs your poster needs

Create a light blue colour box for each section and label them.
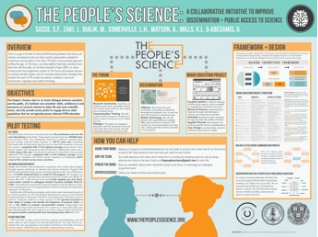
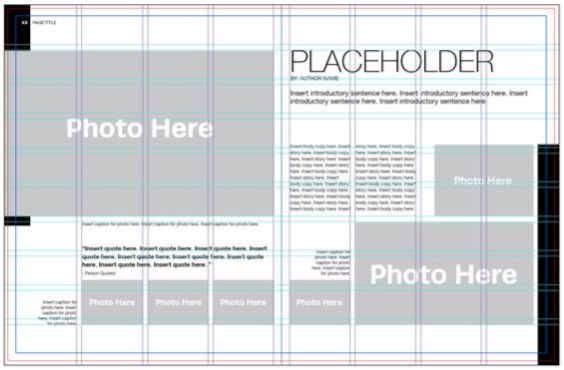
Look at these basic scientific poster layout options
* For more information on what could go in each section, check out 'How to make an academic poster', Annals Of Medicine And Surgery

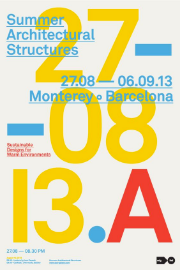
Hierarchy
To communicate as clearly as possible, you need to have a well-designed hierarchy. This means arranging your design elements in a way that draws viewer attention in a logical order through your design. Essentially, hierarchy makes it easier to for others understand your design.
Techniques to help with this include:

Use larger font size for more significant information

Place the most important information at the top or left-hand side of your page

Use colour, shapes, and numbers to direct the viewer's attention

Use white or negative space to give your hierarchy balance, flow, and focus
Let's view some examples to get a stronger idea of what might work for your own design.

Hierarchy and accessibility
Visual communication must also take into account accessibility when putting together a layout. Whether creating a poster for a conference or a webpage, there are certain choices you can make to ensure your design is accessible to a wide range of people.
For example, many people with visual impairments rely on a screen reader. It's important to structure your online designs with appropriate headings and text so that the screen reader relays content in the correct order. Screen readers will read lower numbered headings first. Multiple sections can have the same number.
In the example below, the screen reader would read both sections marked ‘Heading 02' before moving on to 'Heading 03'. Headings with lower numbers typically display with larger text.

Hierarchy checkpoint
How have you ordered your poster content? What techniques did you use to arrange a clear hierarchy? As a checklist make sure that:
- It's easy for a reader to understand.
- It's engaging and attractive to the viewer
- The relationship between content is clear and in order

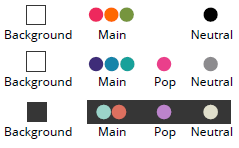
Colour
Colour is a part of visual communication that people read without even being consciously aware of it. The colour scheme can set the mood of your design or enhance meaning through symbolism. Colours can be used to attract attention, add emphasis, group elements together, or differentiate between content.
Using too many colours, not enough colours, or colours that just don't work well together can alienate your viewer. They might turn away before they even look at your great content!
Using a colour palette is the most simple and effective way to use colour within your design.
 Colour Lovers
 Coolers
Warm and cool colours
Warm colours, such as oranges, reds and yellows look as though they come closer, or "advance".


Keep this in mind when you are making decisions about what colour to put in your headings, or on a background, or to use as text.

Colour Contrast
If two overlayed colours are too similar, they will be difficult to see, especially if you are colour blind.

Australia recommend the Colour Contrast Analyser. This tool compares two colours and will give them a pass or fail. While it is made for people with visual impairments in mind, it's good practice and means your text will be easier for everyone to read.
Colour activity
1.
Choose a colour palette for your poster, and implement it.
2.
Change the colour of your headings, images, graphs and figures or section outlines.
3.
Check that your colour contrast passes the Colour Contrast Analyser test.
Text and Image
Less is often more when it comes to text. If you have a choice between using text or an image, keep in mind how powerful images can be in a visual design.
It's human nature to be drawn to imagery. Images can make a strong impression on your viewer before they have even read one word of your content. But don't think of images as just engaging decoration. Images can explain complex information visually or emphasize important information.
A good way to combine text and image are elements like flowcharts, graphs, and diagrams, they not only depict a lot of information but can make your design more appealing.
If you want to use an image from online, you need to ensure that:
- It's high enough quality that it won't pixilate when printed
- You acknowledge or attribute the source of the image
- You always check copyright details for legal use of the image
Image quality and pixilation
Some downloaded images don't print well on a large scale.
This is usually because the resolution of the file (the pixel density) is not high enough. The higher the resolution, the larger it will scale before it pixilates.
Try to find or create images with high resolutions. Your image should be at least 300 dpi.
To find them, look through Deakin University Library's high resolution image resources, or try adding 'high res' or 'high resolution' to a Google search.

High resolution printed image 300 dpi

Low resolution printed image 72 dpi
Images and attribution
Attribution is acknowledging where you have sourced your images or other content from. It's about giving credit where credit is due, both for ethical and legal reasons. So, if you re-use an image from the internet, you must acknowledge the creator.
See Deakin's Guide to
Images and copyright
Copyright restrictions on images depend on how you plan to use them.
You can make copies of images to include in your assessment without needing permission from the copyright owner of the work, provided you meet the following rules:
- The amount that you are using must be 'fair and reasonable' or you may use the five factors of fairness to help ensure that your copying is “fair”.
- Provide correct and complete attribution so you don't breach the creator's Moral Rights.
- The images can only be included in research and assessments that will not be available to the public.
If your assessment will be made public, via a website, public exhibition, screening or festival for example, you'll need to either rely on another section of the Copyright Act, or seek permission from the copyright owner(s).
For more details, visit the Fair Dealing for Research or Study section of the Copyright Act to find out how you can use images in your university assessments

Typography
Typography is the style, arrangement, and appearance of text. Font plays a big role in your overall typographic look. It should enhance your visual design so that a coherent and consistent message is communicated.
Check out these tips:

Bold fonts are good for headlines, but not for body text
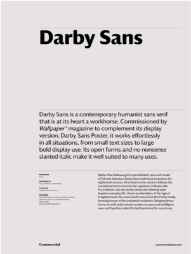
Sans serif is easier to read onscreen, serif on paper.
Thin fonts are trendy but can be hard to read
Avoid the temptation to use more than one or two fonts

Make your font size readable and consistent.
Check your font colour is easy to read with high enough contrast
Typography checkpoint
Have you chosen an appropriate and consistent font for your poster? Does the font size help with readability and giving the viewer tips to what is more significant?
Make sure your font choice helps ease communication and not complicate it!

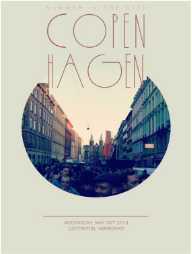
Alignment
A core element of visual design, alignment is how you organise your content relative to a line or margin.
Alignment is important for:
Balancing the overall layout (vertically and horizontally).
Grouping elements together.
Overlaying elements, such as text over an image.
To ground your understanding of the impact different alignment has on your visual design, let's look at some examples.


Alignment checkpoint
Ensure your poster is well aligned. Using gridlines can really help with this.
Be creative – consider trying to overlay elements or including a larger image for impact. Alignment doesn't have to mean blank spaces.

Practicalities - printing
Bleeds
Make sure you have a 3mm or .125 inch bleed all the way around your poster document.
Exporting Marks and bleeds
If you are using Adobe products ensure Marks and bleeds is selected.
Colour
Set the document colour mode to CKMY format, as RGB is for screen only.
Image resolution
Make sure your document is set to 150 dpi (dots per inch) or above (preferably it will be set to 300 dpi).
Export file type
Ask your printing company what file format they prefer it to be in. Usually, most accept PDFs.
Font
Exporting an editable PDF from Illustrator to a printing company? Either ensure you have embedded the font or supply a font file. If the company does not have your font on file, the font will update to whatever is the closest match on their system. This can change your entire design and layout!

Practicalities - outsourcing
There comes a time when things are best left to the professionals.
In a business context, if you are short on time or talent, or the stakes are high, it might be worth considering hiring a professional designer.
As a student you obviously can't hire a professional designer to make a poster for your assessments (that's cheating). But once you have graduated, it might be the way to go. And now that you have an understanding of visual design elements, putting together a brief for a professional designer about your visual communication needs will be a lot easier!
Visual design checklist
A quick refresher on the different elements of visual design you have explored in this module.
1. Layout
Be clear and readable, group related content together and have a good overall balance of text and images.
2. Hierarchy
Make sure it is easy for a reader to understand, the relationship between material is clear and in order and It looks attractive.
3. Colour
Choose a colour palatte using tools such as Colour lovers or Coolers. Make sure you check that your colour contrast passes the Colour Contrast Analyser test.

4. Text and image
Make sure your text is kept short and straight to the point. Images should be at least 300 dpi. Make sure you check the Copyright of the images you use.
5. Typography
Check your font colour is easy to read with high enough contrast. Avoid the temptation to use more than one or two fonts and Bold fonts are good for headlines, but not for body text.
6. Alignment
The easiest way to achieve alignment is to use gridlines. Alignment is important for: Balancing the overall layout, grouping elements and overlaying elements, such as text over an image.
Congratulations
You're finished!
Visual communication relies on good visual design. You now have the know-how to create an assessment worthy poster. Goodluck with your future designs!
Further Help
The Optometry Digital Literacy Toolkit was developed by Deakin University Library.
Please get in touch if you have any questions or feedback.